Scheduling Links
Last updated: February 26, 2026
Scheduling links allows you share availability via a link to your guest so they can choose a time to meet with you. In this guide, we'll go through the step by step process of creating these simple but powerful links so that you never have to go back and forth to find a time to meet.
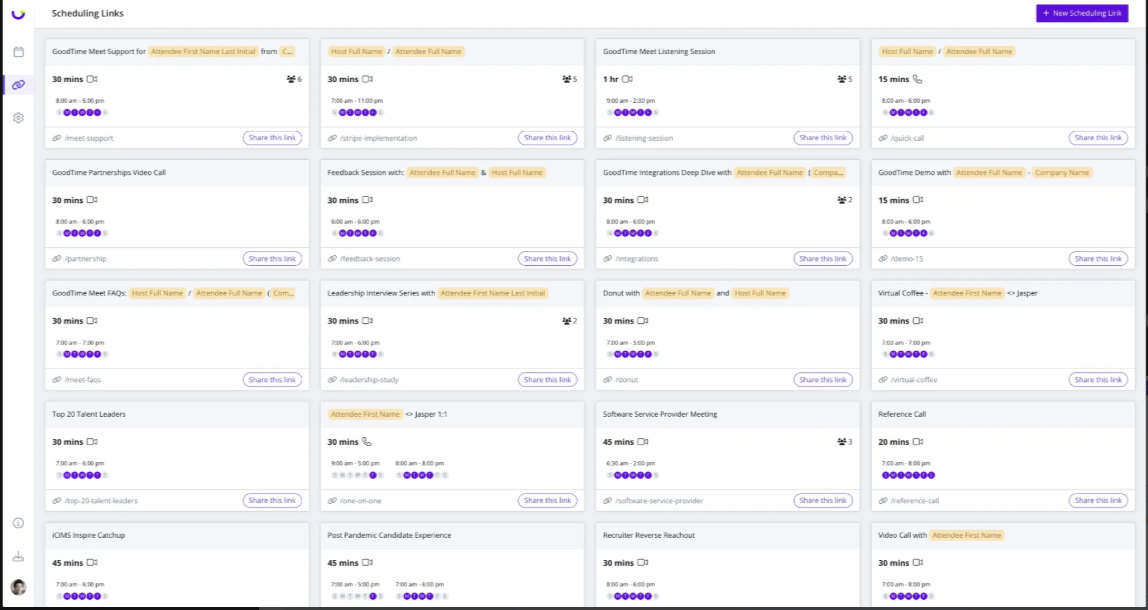
In the Scheduling Link Page , you will see all of the scheduling links you have created including the default link you created during sign-up.
Creating a Scheduling Link
You can create a new scheduling link by clicking the 'New Scheduling Link' button in the top right corner or edit an existing link by clicking the pencil icon of the card.
Step 1. Choose the meeting format. It’s easy to create everything from 1:1 meetings, team meetings, and even distribute meetings across your team.
Pro Tip One-on-One Meetings: commonly used when you want to send a scheduling link and meet one-on-one with the guest (demo calls, support calls, and LinkedIn reach-outs)
Group Meetings: commonly used to allow guests (outside of your organization) to meet with multiple members of your team (cross-company planning meetings, partnership calls, team offsites)
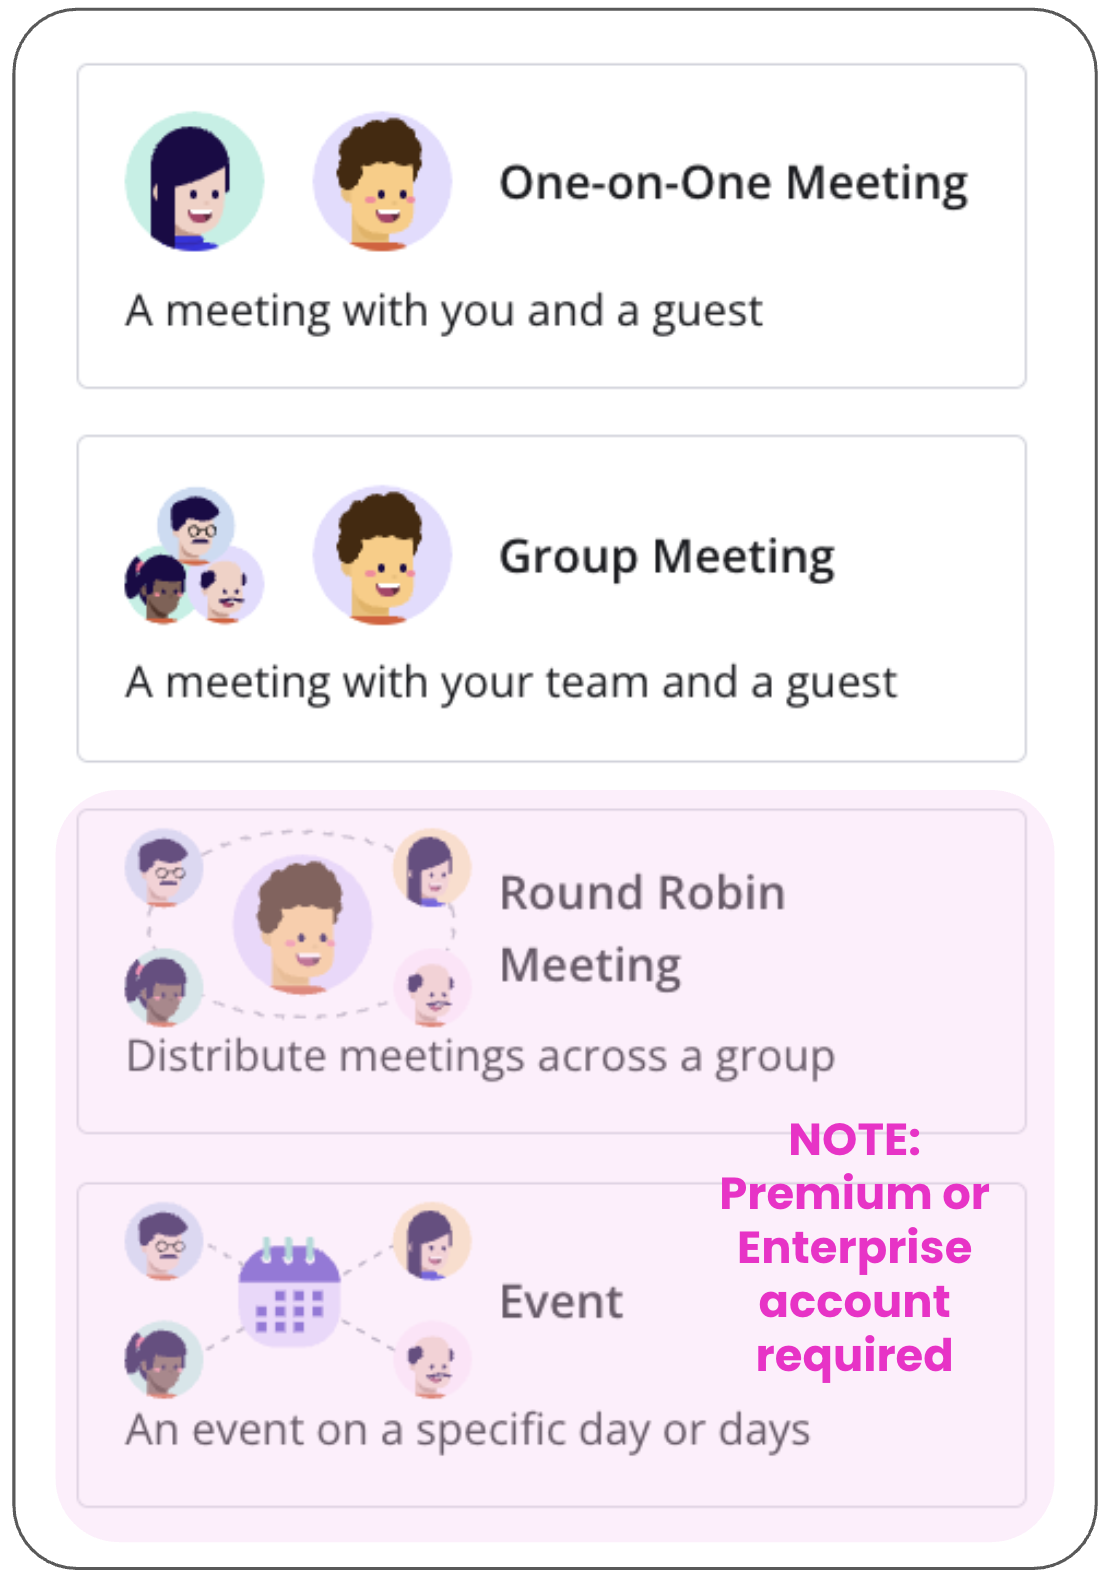
Round Robin Meetings: Commonly used when you want a guest to meet with any one from a group of your teammates (used to distribute inbound calls across sales teams, round robin recruiter screens at job fairs, make it easy for customers to schedule time with any member of a large support team). NOTE: Premium or Enterprise account required.
Event Meetings: Commonly used when you need to share a very specific time window with one or more guests (Career Fairs, Post Webinars Meetings, Investor Weeks, etc).NOTE: Premium or Enterprise account required.
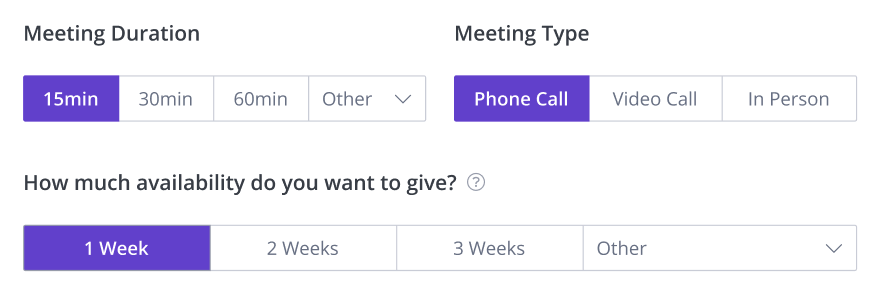
Step 2. Choose your meeting duration and meeting type. We will provide a default calendar invitation based on your meeting type. You can simply create and save your scheduling link from here, but if you want to modify the calendar invitation and some of the other options, you can go through the next steps.
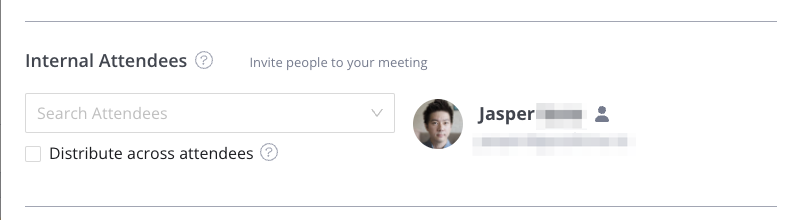
Step 4. (Optional) Add additional attendees. If you selected “Group” or “Distributed” meeting formats, you can add additional people from your team to attend the meeting.
Pro Tip Group Meetings: If you’re scheduling a group meeting, all other internal attendees will be invited to the meeting. Tapping the dark person logo 👤 to the right of the name will toggle whether the attendee should be required or optional. Optional attendees’ calendar availability will be ignored to free up more time for the guest to meet. Round Robin Meetings: You can check or uncheck the “Distribute across attendees” box to enable or disable distributed meetings. A distributed meeting will only pick one person from the list of attendees to join the meeting. Premium or Enterprise Account Required.
Step 5. Check the calendar title and description. The calendar description is what you and your guest will see in the calendar invite. You can use 'variables' with '$', which allow for you to personalize your calendar invites in the calendar invite after the meeting is booked.

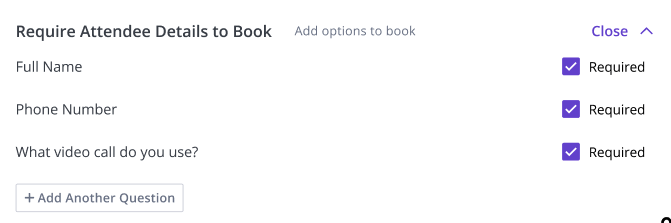
Step 6. If you have any questions for your guest before the meeting, you can add them here.
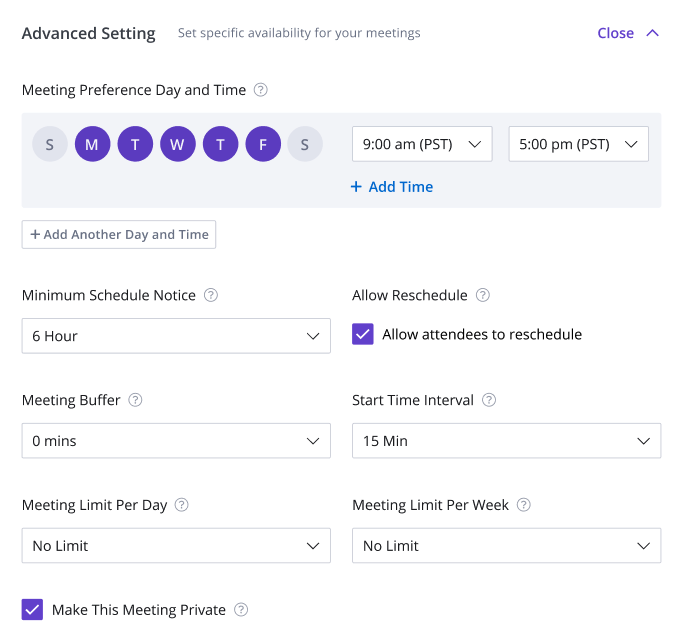
Step 7. If you have a specific availability for your meetings, you can modify the advanced settings.
- Meeting Preference Day and Time: This is your shared availability for this specific scheduling link. Set your hours and days of availability you would like people to schedule meetings with you.
- Minimum Schedule Notice: Use this to prevent last-minute meetings. For example, a notice set to 24 hours will prevent a guest from booking a meeting within 24 hours of opening the link.
- Allow guests to reschedule: Allow guests to reschedule inside the calendar event after the meeting after they have been scheduled.
- Meeting Buffer: A meeting buffer will prevent meetings being scheduled back-to-back with any other event on your calendar. Note: The buffer is added before and after your interview and has the potential to greatly reduce available interview times for your candidate.
- Start Time Interval: This setting allows you to specify that a meeting block can start every hour, half-hour or 15 minutes.
- Meeting Limit Per Day: Meeting limit per day will only apply to this Meet link.
- Meeting Limit Per Week: Meeting limit per week will only apply to this Meet link.
- Make This Meeting Private: This meeting will be shown as private to anyone who does not have explicit access to your calendar.
Attachments:
Untitled2.jpeg